

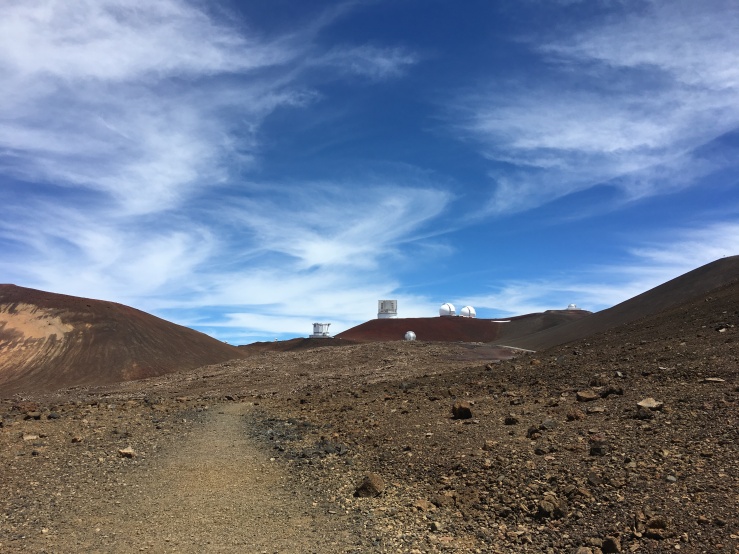
Mauna Kea is a dormant volcano on the Big Island of Hawai’i. It is the tallest mountain in the world (yes – taller than Everest, google it!) sitting at 13, 796 feet or 4.2kms above sea level. It’s home to the world’s largest observatory and to the snow goddess Poli’ahu in Hawaiian mythology. The summit is considered sacred to native Hawaiians.
I can’t explain what it was like to hike up Mauna Kea, the views were spectacular (think barren Mars like terrain, above the clouds, no animals or other humans in sight) it’s hard to find the right words to describe the raw beauty of it, you will just have to go see it for yourself! Below, I’ll describe how we (friend and I) did it, tips and what we would do differently next time.
To hike or drive? Sunrise, sunset, stargaze?
There’s a few options of when to see the summit and how to get there.
Hiking – the hike up the summit is 6 miles or 10km, approximately takes 8-10 hours return, and Visitor Information Station (VIS) recommends hiking before 8:15am to get back to the VIS by sunset.
Driving – Only place in the world where you can drive from sea level to 13,796 feet in 2 hours. Please note that on the VIS, they recommend only 4WD vehicles with low range drive up the summit. There’s plenty of information on their website here if you decide to drive up.
Tours – I believe there’s also tours that go up to the summit too for sunrise, sunset & to stargaze. The VIS sets up telescopes on a regular basis to stargaze, check their website for more info.
Where was the fun in driving, we were keen for a challenge and decided to hike up to the summit!
Preparation
This was probably one of our biggest learning curves, we did absolutely NO training for the hike! My friend and I are both in our mid 20’s relatively healthy and fit however we really struggled with the incline.
We did buy lots of protein bars, lifesaver lollies/sugary lollies (important – trust me, more on this later) and anti-nasuea medication. We took the medication at the VIS while we were waiting just as a precautionary measure.
Clothing wise, I would suggest wearing layers. We had on underneath long sleeve thermal shirt, then a long sleeve shirt & a jacket, for bottoms we wore thermal leggings and tights. I recommend wearing at least running shoes to hike, even better if you have proper hiking boots. I only had my old Nike runners and my friend wore hiking boots.
Other more obvious tips:
- Check the weather a few days before and then again the night before
- Bring water, my friend had a camel pack and I had 3 large bottles of water.
- Try and have a healthy meal before the hike, not too heavy, drink the recommended amount of water and have a plenty of rest
- Try to not smoke before the hike & limit alcohol intake the night before
- Bring rain gear, weather can change pretty fast up there
- Wear sunscreen, lip balm, hat and sunglasses
- If you went scuba diving the day before, VIS recommends waiting at least 24 hours before hiking/driving up to the summit.
- Lastly, bring toilet paper & plastic bags- it’s a 10 hour hike, who can hold their bladder/colon that long?!
Getting there:
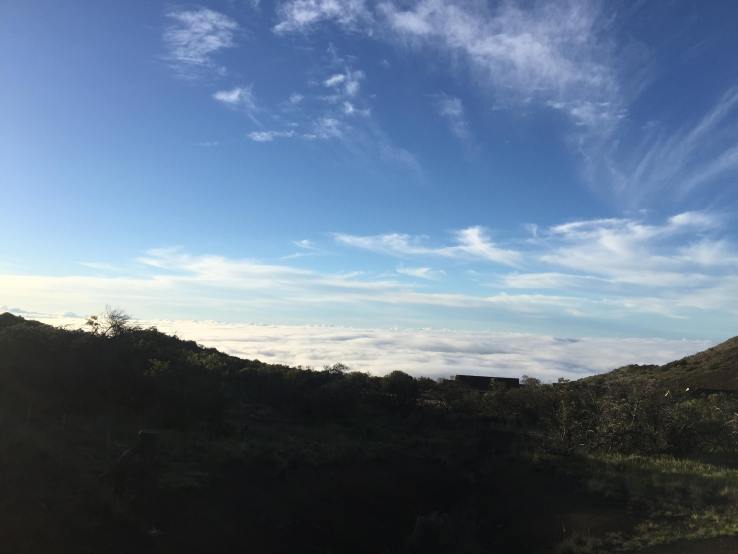
We left Hilo in the early hours of the morning, and arrived around 7am, the views were spectacular as we were reaching the VIS, photos don’t do it justice. We parked at the VIS which is at 9,200 feet or 2.8 kms above sea level and waited 45 minutes to adjust to the altitude.
Tips:
- Definitely wait at least 30 mins at the VIS
- Register at the VIS there’s a form in a box at the very front of the office (you just never know!)
- If you’re not feeling well, don’t go any further! Symptoms to look for: dizziness, mild – severe headache, nausea, weakness & fatigue
The Hike:
To get to the start of the hike, exit the VIS carpark, follow the main road heading north on the left hand side until you reach the sign below. It’s straightforward from there as the trial is visible, the incline was INSANE, there was no time where it was completely flat and my calves were on FIRE!


Tip: Earlier in the post I talked about bringing lollies or anything sugary. At one point, my friend had a mild headache and felt nauseous, we took a break (let our bodies adjust to the altitude) and sucked on some life savers to get a bit of energy and sugar which eased her headache and nausea.


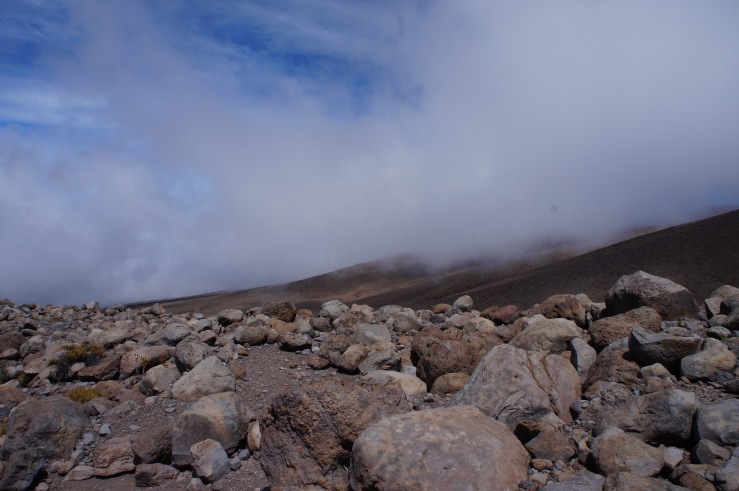
Unfortunately, we didn’t make it to the top 😦 We turned around a little bit after halfway due to the clouds closing in and our calves & legs were just in so much pain! I believe it we had kept going, we would’ve reached a fork taken the left path to reach the summit. My boyfriend, Kevin who decided not to hike with us, drove up and got to see Lake Waiau and of course the famous observatory, pics below!

I have no doubt that I’ll be coming back to conquer Mauna Kea again, next time I’ll be more prepared and ready. Despite groaning and moaning up the mountain, we really enjoyed it and glad we attempted the hike.
Tip: It can be a bit scary when you go down, it’s steep, the terrain is rocky and sandy so it’s easy to slip. A lady that passed us recommended that we dig in our heels which helps with stability and ensures we don’t go rolling down the mountain!
In summary:
- Prepare for this hike by getting used to walking up steep incline
- Check the weather a few days before and then again the night before
- Bring plenty of water, snacks, sugar lollies & something to eat for lunch.
- Make sure you have plenty of rest the night before
- Try to not smoke before the hike and limit alcohol intake the night before
- Bring rain gear, weather can change pretty fast up there
- Wear sunscreen, lip balm, hat and sunglasses
- If you went scuba diving the day before, VIS recommends waiting at least 24 hours before hiking/driving up to the summit.
- Bring toilet paper & plastic bags- it’s a 10 hour hike, who can hold their bladder/colon that long?!
- Wait at least 30 mins at the VIS
- Register at the VIS there’s a form in a box at the very front of the office (you just never know!)
- If you’re not feeling well, don’t go any further! Symptoms to look for: dizziness, mild – severe headache, nausea, weakness & fatigue
- Dig in your heels when going back down which helps with stability and ensures you don’t go rolling down the mountain
Will you be adding Mauna Kea to your bucket list? Have you reached the summit, what was your experience?
Hope this quick guide helps anyone who wants to tackle and experience this killer but spectacular hike 🙂
Side note: We tried freeze dried ice cream, they sell this at the VIS – very interesting!

